Construction
Polished Concrete vs Epoxy Pros and Cons: Best Flooring C…
Imagine standing in a showroom where every light fixture reflects perfectly off a mirror-like surface beneath your feet. It’s striking. This isn’t just about aesthetics: it’s about making a high-stakes decision between two heavyweight champions of modern surfacing. When you evaluate polished concrete floors vs epoxy coating pros and cons, you’re choosing the long-term personality of your facility or home. It’s a choice that dictates your maintenance budget for the next decade. You want it to last. But you also need it to perform under pressure.
Which flooring option offers the best long-term value?
Cost matters. You’ll likely notice that polished concrete represents a smaller initial investment compared to high-build coatings. Basic polishing can sometimes cost half as much as a multi-layer epoxy system. It’s lean. It utilizes the slab you already have without adding thick new materials. You’re paying for labor and diamond-grit tooling rather than expensive resins.
And then there’s the lifecycle cost. Polished concrete rarely needs to be replaced: it only needs occasional re-polishing. It stands up. Epoxy eventually peels or yellows after years of heavy traffic. If you’re looking for the lowest price over twenty years, the polished concrete floors vs epoxy coating pros and cons debate tilts heavily toward the natural stone look. You save on the front end and the back end.
How does durability vary between these two surfaces?
Strength is relative. Epoxy coating is a powerhouse when it involves impact resistance or heavy vibrations. It’s thick. The resin acts as a sacrificial barrier that absorbs the shock of dropped tools or heavy machinery. This makes it a staple for shops where things tend to go bang. You won’t see the concrete underneath crack as easily.
But polished concrete wins on pure hardness. The densification process creates a surface that is incredibly difficult to scratch. It’s dense. While epoxy can be gouged by dragging heavy metal pallets, polished concrete resists those abrasions with ease. It’s a professional-grade finish. Think about your specific environment before you commit to one over the other.
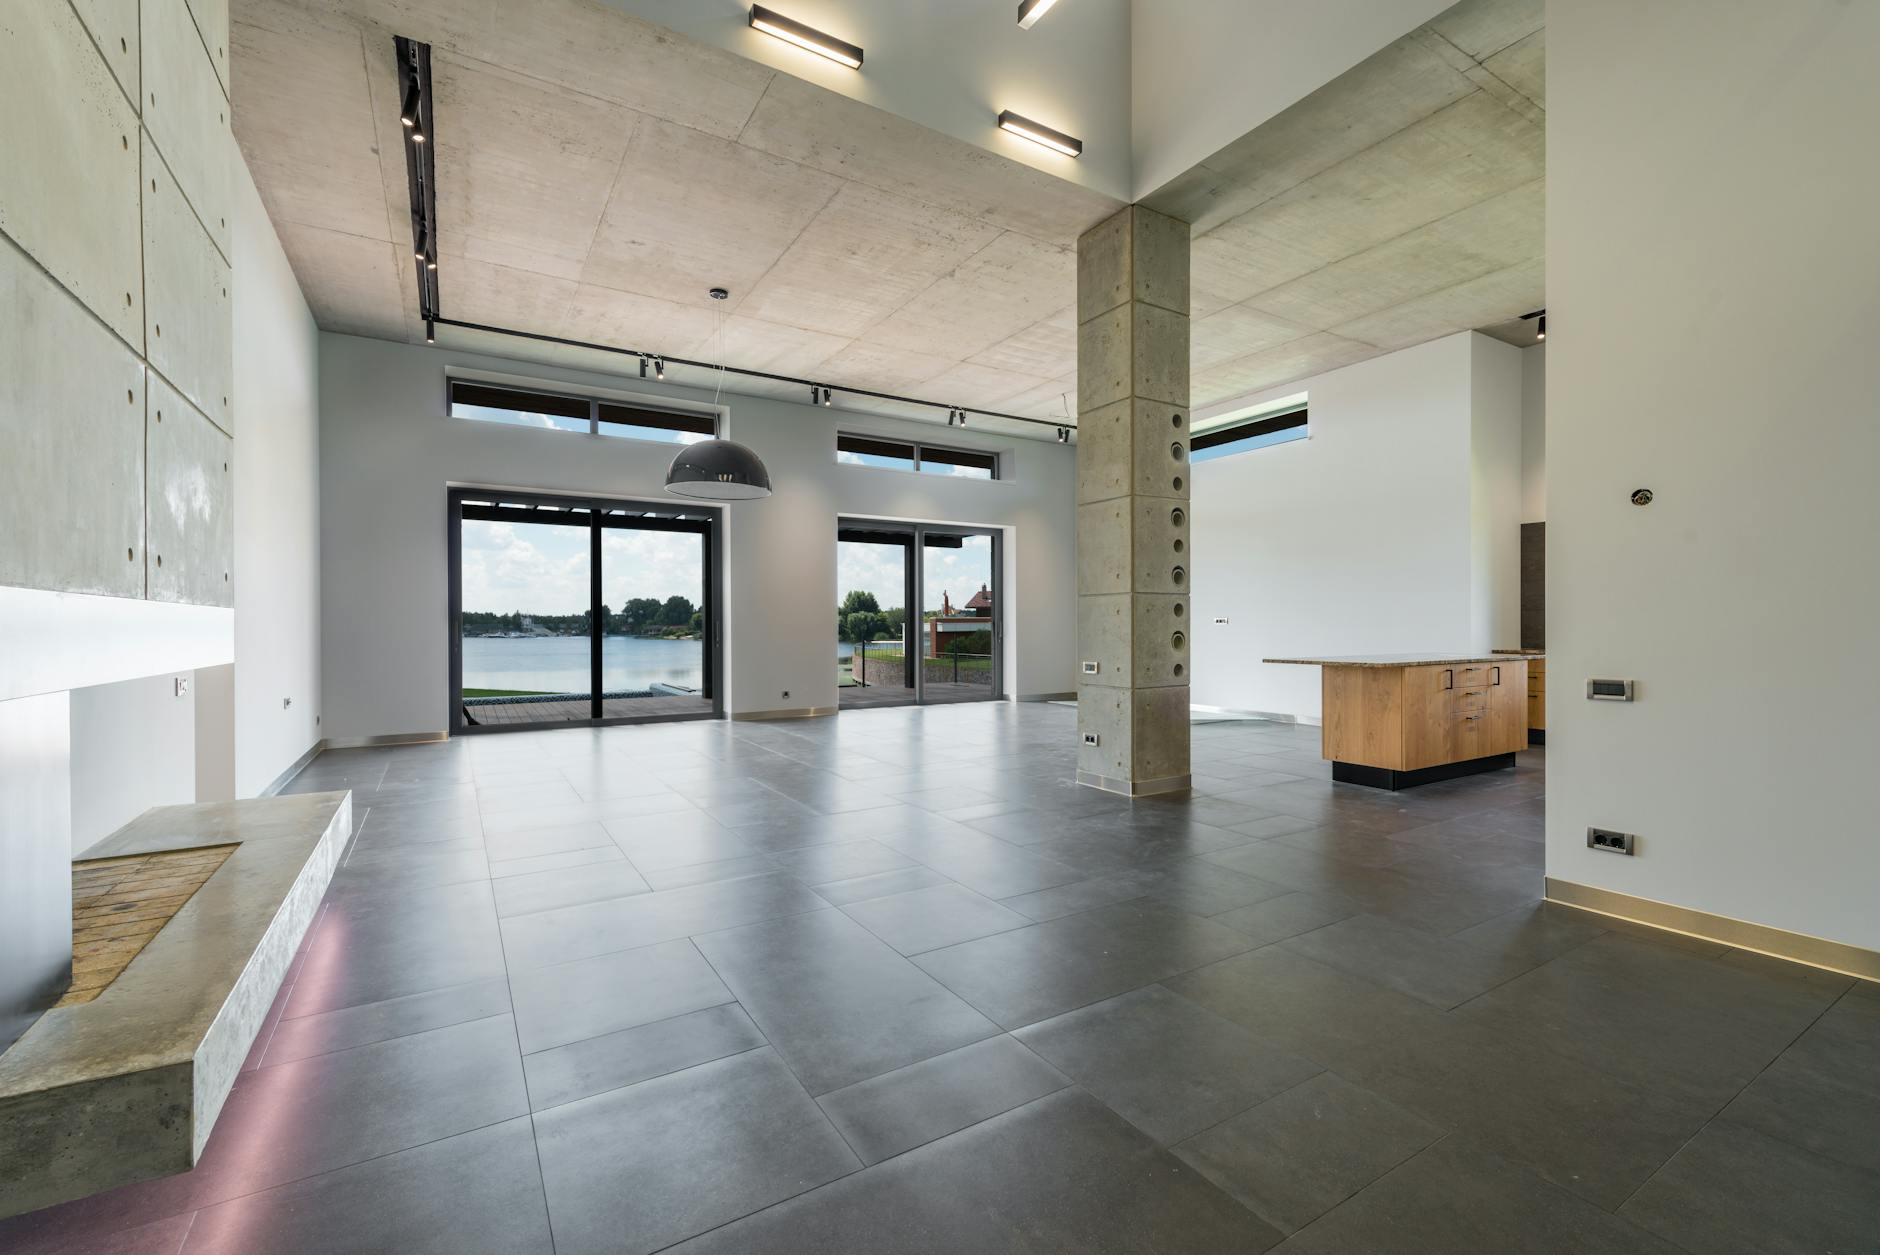
Photo by Max Vakhtbovych on Pexels Is chemical resistance a priority for your space?
Spills happen. If you’re managing a garage or an industrial lab, epoxy is your best friend. It’s non-porous. It creates a seamless, liquid-tight seal that prevents oils, acids, and harsh cleaners from reaching the concrete. You can wipe up a puddle of motor oil three hours later without leaving a permanent dark stain.
Polished concrete handles water well, but it has a weakness. It’s breathable. Even with high-quality guards and sealers, acidic liquids like vinegar or citrus can etch the surface if left too long. It’s sensitive. If your floor will face constant chemical exposure, the polished concrete floors vs epoxy coating pros and cons analysis favors the resinous coating. Don’t risk a stained slab if you work with fluids.
How much maintenance are you willing to perform?
Cleaning shouldn’t be a chore. Both floors are leagues better than carpet or tile because they don’t hide dust. They’re hygienic. For a polished surface, you just need a dust mop and an occasional wet loop with a neutral pH cleaner. It’s simple. You don’t have to worry about the finish flaking off into your mop bucket.
Epoxy requires a bit more vigilance. You must keep it free of grit. Because it’s a topical coating, sand and dirt act like sandpaper under foot traffic. It wears. Over time, the gloss might dull in high-traffic walking paths, requiring a fresh topcoat to restore the shine. You’ll spend less time on daily cleaning but more time on long-term refinishing.
Which floor provides better light reflectivity and beauty?
Brightness changes everything. Polished concrete can increase light reflectivity by up to 100 percent. It’s bright. This reduces the need for overhead lighting and can actually lower your energy bills. The look is industrial and chic: showing off the natural aggregate of the stone. It’s authentic.
However, epoxy is the undisputed king of customization. It can increase light reflectivity by a massive 300 percent. It’s brilliant. You can choose any color, add metallic flakes, or even paint safety lines and logos directly into the floor. It’s bold. If your goal is a specific brand aesthetic or a bright white laboratory feel, epoxy is the only way to go.
What are the safety and slip resistance concerns?
Grip is vital. A common misconception is that high-gloss floors are always like ice. They aren’t. When dry, polished concrete often meets or exceeds federal safety standards for slip resistance. It’s grippy. The friction is surprisingly high because of the smoothness of the surface against shoe rubber.
But things change when the floor gets wet. Both surfaces can become hazardous without the right additives. It’s risky. In an epoxy system, you can mix in slip-resistant aggregates like aluminum oxide or glass beads. This provides a sandpaper-like texture that works even in oily conditions. You have more control over the safety profile with a coated system.
How do environmental factors influence your choice?
Sustainability is a major factor for modern builders. Polished concrete is one of the greenest options available. It’s eco-friendly. Since you’re using the existing slab, you aren’t bringing in new raw materials or toxic chemicals. There are no Volatile Organic Compounds (VOCs) to worry about during installation.
Epoxy has come a long way, but it’s still a chemical product. It’s synthetic. While many modern resins are low-VOC or solvent-free, they still involve a chemical reaction during the curing process. And eventually, that material will need to be ground off and replaced. It’s a heavier footprint. For those seeking LEED certification or a minimal environmental impact, the polished concrete floors vs epoxy coating pros and cons comparison favors the polished route.
Choosing the right surface for your facility
Selecting between these two finishes depends entirely on your daily operations. If you want a low-cost, permanent solution for a retail space or a modern home, go with polished concrete. It’s timeless. It’ll stay beautiful with minimal effort for decades. You won’t regret the sophisticated, natural look.
If you need a heavy-duty, chemical-proof floor for a workshop or a high-traffic garage, epoxy is the winner. It’s tough. It protects the structural integrity of your concrete from the harshest environments. Weigh the polished concrete floors vs epoxy coating pros and cons against your specific needs. Your floor is the foundation of your productivity: make sure it’s built to last.
Frequently Asked Questions
Is polished concrete cheaper than epoxy?
Yes, usually. Polished concrete involves fewer materials and lower long-term maintenance costs. It’s affordable. The savings are most noticeable in large industrial or commercial spaces.
Can epoxy be applied over polished concrete?
No, not directly. Polished surfaces are too smooth for epoxy to bond. It’s impossible. You must grind the surface back to a rough profile to ensure the coating sticks properly.
Which floor lasts longer?
Polished concrete generally has a longer lifespan. It’s permanent. While epoxy might need a refresh every five to ten years, a polished floor can last twenty years or more with simple re-polishing.
Are these floors good for residential garages?
Both are popular. Epoxy is better if you do a lot of car repair or work with chemicals. It’s protective. Polished concrete is a great choice if you just want a clean, dust-free space for parking and storage.
Best High Strength Concrete for Driveways: Top Rated Mixes
Most home centers sell you the exact same yellow bag of concrete for every single project, regardless of the load it needs to carry. It’s a convenient lie that leaves your driveway crumbling under the weight of your SUV within a single winter season. You don’t need a general purpose filler. You need the best high strength concrete mix for driveway repairs that can actually handle 4,000 pounds of rolling steel without snapping like a dry biscuit. Finding that specific ratio of cement to aggregate is the difference between a permanent fix and a recurring headache. It’s about chemistry, not just convenience.
Why does the PSI rating matter for your driveway?
Pressure matters immensely. Your driveway isn’t just sitting there, it’s constantly resisting the downward force of vehicles and the upward thrust of freezing soil. Standard concrete usually hits 2,500 to 3,000 PSI, which is fine for a garden path but risky for a heavy truck. High strength mixes aim for 4,000 to 5,000 PSI to ensure the structural integrity of the repair stays intact.
And these ratings reflect the material’s ability to resist compression over a 28 day curing period. If you use a weak mix, the bond between the old slab and the new patch will fail because the materials expand at different rates. Use a pro-grade mix with high cement content. It’s stronger. It’s more durable.
Which concrete brands offer the best high strength concrete mix for driveway repairs?
Quikrete and Sakrete dominate the market for a good reason. The Quikrete 5000 High Early Strength Concrete Mix is often cited as the gold standard for residential structural work because it gains strength quickly. You can walk on it in 10 to 12 hours, which is vital if you need to use your garage. This specific best high strength concrete mix for driveway repairs reaches 5,000 PSI, providing a surface that resists the pitting caused by road salts.
But Sakrete also offers a formidable competitor with their High-Strength Concrete Mix. It features a rich blend of portland cement and graded aggregates that outperform standard bagged goods. These products aren’t just sand and gravel thrown together. They’re engineered. They’re reliable.
Photo by Mike van Schoonderwalt on Pexels How do crack resistant additives improve repair longevity?
Standard concrete is brittle. Even a 5,000 PSI mix can develop hairline fractures if the ground shifts even slightly under your car’s tires. This is why many homeowners look for crack resistant concrete mix options that incorporate synthetic fibers into the dry blend. These fibers act like internal rebar, holding the mix together as it shrinks during the hydration process.
And these specialized mixes reduce the need for wire mesh in smaller patch jobs. When you choose the best high strength concrete mix for driveway repairs, look for mentions of polymer modification. It increases the bond strength. It adds flexibility. It stops cracks before they start.
What is the ideal thickness for a high strength driveway patch?
Depth is critical. You cannot simply smear a thin layer of high strength concrete over a shallow divot and expect it to stay. Most structural mixes require a minimum thickness of 2 inches to maintain their internal strength and prevent delamination. If your repair is shallower than that, you’ll need a different product altogether.
But for deep potholes or edge repairs, the best high strength concrete mix for driveway repairs thrives when it has volume. Ensure you’ve dug out a clean, square-edged hole rather than a feathered slope. Precise edges help. They prevent chipping. They ensure a flush finish.
Can you use polymer modified patchers for thinner repairs?
Thin repairs are tricky. If your driveway has surface scaling rather than deep holes, a standard aggregate mix will be too chunky to finish smoothly. Products like Sakrete Top ‘N Bond are specifically designed for these scenarios where the depth is less than 2 inches. These are polymer modified, meaning they stick to old concrete with an almost glue-like tenacity.
And these mixes allow for feathered edges that won’t flake away after the first frost. While a 5,000 PSI structural mix is great for holes, these pro-grade patchers provide the smoothness needed for aesthetics. They’re tough. They’re versatile.
How does water-to-cement ratio affect the final strength?
Water kills concrete. It’s the most common mistake DIYers make because they want the mix to be easy to pour and spread. Adding too much water creates microscopic voids in the concrete as it evaporates, which drastically lowers the PSI and makes the patch porous. To get the best high strength concrete mix for driveway repairs, you must follow the bag instructions to the letter.
And you should aim for a consistency like thick peanut butter, not soup. A stiff mix is harder to work with but results in a significantly more durable surface. Work it hard. Pack it tight. It will last longer.
How should you prep the surface for maximum adhesion?
Cleanliness is everything. Concrete won’t bond to dust, oil, or loose crumbling rocks, no matter how strong the mix is. You need to use a pressure washer or a stiff wire brush to remove every bit of debris from the repair site. Some pros even recommend using a bonding adhesive or a concrete milk slurry to prime the area before the main pour.
But don’t leave standing water in the hole. The area should be damp but not soaked, a state known as saturated surface dry. This prevents the old concrete from sucking the moisture out of your new patch too quickly. Prep carefully. Pour quickly.
Mastering the cure for a permanent driveway fix
Success depends on patience. Even the best high strength concrete mix for driveway repairs will fail if it dries out too fast in the sun or wind. Hydration is a chemical reaction that requires moisture to continue over several days. Cover your fresh patch with plastic sheeting or mist it gently with water several times a day for at least a week.
And you should avoid driving on the new section for a full 7 days if possible. While early strength mixes allow for foot traffic quickly, the weight of a vehicle can cause internal micro-cracking during the first week of curing. Protect your investment. Let it harden. Enjoy the results.
Common questions about driveway concrete repair
Can I use regular mortar mix for driveway cracks?
No, mortar mix lacks the large aggregates needed for structural loads and will likely crumble under a car’s weight.What is the best temperature for pouring concrete?
The ideal range is between 50 and 80 degrees Fahrenheit, as extreme heat causes rapid drying and freezing temperatures stop the curing process entirely.Do I need to use a bonding agent?
While not always mandatory for deep holes, a bonding agent significantly improves the success rate of patches by creating a chemical bridge between old and new materials.How long after the repair should I seal the driveway?
You should wait at least 28 days for the concrete to fully cure and its moisture levels to stabilize before applying any topical sealer.Fix Hairline Cracks in Stamped Concrete: Easy DIY Repair
Your morning coffee tastes slightly bitter as you spot that thin, jagged line snaking through your slate-textured slab. It wasn’t there last summer. Seeing those first signs of wear can feel like a personal betrayal by your home. You invested in a premium finish, yet now you are staring at a structural blemish that threatens to grow. Learning how to fix hairline cracks in stamped concrete patio surfaces early is the difference between a simple Saturday project and a total tear-out. It’s time to act. You can restore that flawless look with the right approach.
Why do hairline cracks appear in your stamped concrete?
Concrete shrinks as it cures. It’s a geological reality that even the best contractors cannot entirely avoid. When the moisture leaves the mix, the volume decreases and internal tension builds up. These tensions eventually snap. This creates those tiny, spider-web patterns known as shrinkage cracks or crazing. They are usually less than one-eighth of an inch wide.
Temperature swings also play a massive role. Concrete expands in the summer heat and contracts when the winter frost hits the ground. If your patio doesn’t have enough control joints, the slab will decide where to break on its own. It’s often an aesthetic issue rather than a structural failure. But you must address them before water gets inside. Trapped water freezes and turns tiny gaps into wide craters.
Ground movement is the final culprit. If the soil underneath wasn’t packed tight, parts of the patio might sink slightly. This shifting puts pressure on the rigid surface. You’ll see cracks following the deepest parts of the stamped pattern. Identifying the cause helps you choose the right repair method.
What tools do you need to repair stamped concrete cracks?
Preparation is everything here. You can’t just slap new cement over old dirt and expect it to hold. Grab a stiff nylon or wire brush to scrub the area clean. A shop vacuum or an air compressor is vital for pulling debris out of the narrowest gaps. You need a clean surface for the bond to work. Don’t skip the cleaning step.
The repair materials depend on your specific color. You’ll need color-matched cement paste or a specialized clear polymer filler. Many pros use a product like MatchCrete Clear because it allows the original pigment to show through. Have a small trowel or even a putty knife ready for smoothing. A sponge and a bucket of clean water are also essential. These tools ensure a professional finish.
Safety gear matters too. Wear gloves because cement is caustic and will dry out your skin. Safety glasses are smart if you are using compressed air. If you are using chemical sealers, a mask ensures you don’t breathe in volatile organic compounds. Collect all your supplies before you start. It makes the process much faster.
- Stiff wire brush and nylon scrub brush
- High-pressure air canister or shop vac
- Color-matched grout or concrete repair paste
- Small margin trowel or flexible putty knife
- Solvent-based stamped concrete sealer
- Clean rags and a large sponge

Photo by www.kaboompics.com on Pexels How do you clean the crack for a successful bond?
Scrub the crack vigorously. Use your wire brush to dislodge any loose sand, moss, or old sealer that’s trapped inside. You want to see the raw, grey interior of the concrete gap. Rubbing the surface isn’t enough. You must get deep.
Blow out the dust. Any leftover powder acts as a barrier that prevents your patch from sticking. If you don’t have an air compressor, use a straw to blow air directly into the line. Be careful not to get dust in your eyes. It must be bone dry. Moisture trapped inside will cause the new patching material to flake off within weeks.
Check for oils or grease. If your patio is near a grill, you might have hidden fat deposits. Use a degreaser if the area looks dark or slick. Rinse it thoroughly and wait for it to dry completely. A clean crack is a permanent repair. A dirty one is just a temporary mask.
Can you use the hammer and vibration method for small cracks?
This is a secret pro trick. If the crack is extremely thin, you might be able to close it without adding new material. Grab a ball-peen hammer. Use the rounded end to gently tap the concrete right next to the crack. Do not hit the crack itself. You are trying to vibrate the aggregate back together.
Move from side to side. Work your way down the length of the line with light, rhythmic taps. This technique is best for surface crazing where the structural integrity is still high. It works by slightly displacing the surface material to bridge the gap. It is surprisingly effective. This avoids the need for color matching entirely.
Be careful not to swing too hard. You don’t want to create new chips or spalling. The goal is a subtle shift, not a heavy impact. If the crack doesn’t close after a few passes, stop. It means the gap is too wide for this method. Move on to using a colored cement paste instead.
How do you apply color-matched paste to maintain the aesthetic?
Matching the color is your biggest challenge. Most people fail because they use standard grey concrete filler which stands out like a sore thumb. You should contact the original installer to find out what color hardener they used. Many manufacturers sell small patch kits in the same shades. Mixing a tiny amount is the next step.
Mix your paste to a peanut butter consistency. Use a little bit of bonding agent instead of just water to give it extra grip. Small amounts work best. Press the paste into the crack using your finger or a small putty knife. Pack it in tight. Ensure there are no air pockets left behind.
Wipe the excess away immediately. Use a damp, but not dripping, sponge to clean the surrounding stamped pattern. You only want the repair material inside the crack. If you leave a haze on the surface, it will be visible once it dries. Work in small sections. This prevents the paste from hardening before you can clean it up.
Pro tip: Sift some dry color hardener over the wet repair. Rub it in with your thumb to create a textured look. This mimics the natural variegation of the patio. It hides the repair line perfectly. You won’t even notice where the crack was.
Should you use a clear resin for hairline repairs?
Resins are excellent for modern patios. A polyurethane or epoxy-based clear filler penetrates deep into the slab. These materials remain slightly flexible after they cure. This flexibility is a huge advantage. It allows the patio to move without the crack reopening immediately.
Pour the resin slowly. Most come in a dual-cartridge system that mixes the chemical as it leaves the nozzle. Let the liquid flow into the crack until it is slightly overfilled. It will naturally settle into the bottom of the gap. Gravity is your friend here. It ensures the entire depth is sealed.
Trowel it flat while it is still tacky. Some clear fillers can be sanded down once they are dry, but it’s easier to get it right the first time. If you use a UV-stable resin, it won’t turn yellow in the sun. This keeps the repair invisible for years. It’s a high-performance solution for how to fix hairline cracks in stamped concrete patio areas that see heavy foot traffic.
When is it time to reseal the entire patio surface?
Repairs look best under a fresh coat. Once your cracks are filled and cured, the final step is resealing the entire slab. A good sealer acts as a protective skin. It keeps water out of the newly repaired areas. It also brings back the wet look depth of the original color.
Apply sealer in thin coats. Using a 3/4 inch nap roller is the standard method for stamped concrete. If you go too thick, the sealer will bubble or turn white. Two thin coats are always better than one heavy one. Let the first coat dry for at least four hours. This creates a durable, weather-resistant finish.
Wait for a dry window. Ensure there is no rain in the forecast for at least 24 hours. High humidity can also ruin the bond of the acrylic sealer. When you finish, the cracks should be completely blended into the texture. Your patio will look brand new again. You’ve successfully extended its lifespan.
Take action to protect your outdoor investment
Small cracks never get smaller on their own. They are an invitation for dirt, ice, and weeds to destroy your masonry. By following these steps on how to fix hairline cracks in stamped concrete patio, you are taking control of your home’s value. You don’t need a professional crew for every minor blemish. You just need a clear Saturday and the right materials. Clean the area properly, match your colors with care, and finish with a high-quality protective sealer. Your patio will stay the centerpiece of your backyard. Get started today before the next big storm arrives.
Frequently Asked Questions
Will a crack in stamped concrete patio get wider?
Yes, untreated cracks almost always expand. Moisture enters the gap and freezes, which exerts massive pressure on the concrete. Dirt and seeds also collect in the cracks, allowing weeds to grow and push the slab apart. Early repair is the only way to stop this cycle.Can I use regular caulk to fix stamped concrete cracks?
Standard household caulk is a poor choice. It doesn’t bond well to masonry and usually has a shiny, rubbery texture that looks terrible against natural stone patterns. Use a sand-sanded grout or a specialized masonry crack filler that is designed to withstand outdoor conditions and UV exposure.What is the best temperature for concrete repair?
The ideal temperature is between 50 and 80 degrees Fahrenheit. If it’s too hot, the patching material dries too fast and won’t bond. If it’s too cold, the chemicals in the resins or sealers won’t cure properly. Always work in the shade when possible to keep the surface cool.Is it normal for new stamped concrete to have hairline cracks?
It’s very common. Nearly all concrete develops some level of minor cracking due to the nature of the material. As long as the cracks are not wider than a coin and there is no vertical displacement, they are likely just aesthetic. Most contractors consider small hairline cracks to be within acceptable industry standards.Concrete Slab Cost Calculator: Estimate Square Foot Pricing
Building a home addition without a budget is like shopping for groceries with a blindfold. You grab what feels right and hope the total doesn’t ruin your month. It’s a gamble. And when you’re dealing with raw materials, a concrete slab cost calculator per square foot serves as your eyes. It prevents the stinging shock of a bill that’s twice what you expected. You’ll move from guessing to knowing exactly how much grey liquid gold you need for that new patio.
How much does a concrete slab cost per square foot in 2026?
Prices have shifted lately. You’ll likely spend between $6.30 and $12.80 for every square foot of finished work. This range covers the basic materials, professional labor, and site preparation. It’s a significant investment. But it lasts decades. Most homeowners find that a standard 4 inch thick slab for a garage or shed sits right in the middle of that price bracket. Prices fluctuate based on your local market and the current cost of fuel for delivery trucks.
Labor is your biggest expense. While the wet mix itself is affordable, the physical task of grading, forming, and finishing requires a skilled crew. And you shouldn’t cut corners here. A cheap pour often leads to cracks that swallow your savings later. Expect to pay more if your backyard is on a steep slope or if the truck can’t reach the site easily. These logistical hurdles add hours to the job. They drive up your total concrete slab cost calculator per square foot results.
- Material costs: Average $3.10 to $4.50 per square foot for the concrete mix alone.
- Labor rates: Professionals typically charge $4.50 to $7.25 per square foot for installation.
- Reinforcement: Rebar or wire mesh adds about $0.45 to $0.90 per square foot.
What factors change your concrete slab cost calculator per square foot estimates?
Thickness changes everything. A 4 inch slab is standard for foot traffic. But your driveway needs 6 inches of depth. This 50 percent increase in volume doesn’t just raise the material price. It requires more time to set and finish properly. You’re effectively buying more weight. And more weight means higher delivery fees from the ready-mix plant. Always verify the depth requirements with your local building codes before you start calculating your needs.
Reinforcement is another variable. Plain concrete is strong under pressure but weak when pulled apart. This is why pros add steel rebar or fiber mesh to the mix. It stops small cracks from turning into grand canyons. And if you want a decorative finish, the price climbs even higher. Stamped or stained concrete can double your concrete slab cost calculator per square foot figure instantly. It turns a utility surface into a piece of art.
Common add-ons that impact pricing:
- Vapor barriers: Essential for indoor slabs to prevent moisture from rising through the floor.
- Sub-base preparation: Adding a layer of compacted gravel or sand ensures the slab doesn’t shift.
- Edge thickening: Slabs that support heavy walls need deeper edges for structural integrity.

Photo by www.kaboompics.com on Pexels Why should you use a concrete slab cost calculator per square foot before hiring?
Knowledge is power. Contractors respect a homeowner who knows the math. When you run the numbers through a concrete slab cost calculator per square foot, you establish a baseline for your bids. It helps you spot a quote that’s suspiciously low or offensively high. Neither is good. A low-ball bid might mean the contractor is skipping the gravel base or using a low-psi mix. High bids might just be a busy contractor’s way of saying they don’t want the job.
You also avoid the embarrassment of running out of mud mid-pour. Concrete is a time-sensitive material. It waits for no one. If you order three yards but actually need four, you’re in big trouble. The first half will start to set before the second truck arrives. This causes a cold joint. It’s a structural weakness that never goes away. Precise calculations ensure the entire slab is one solid, monolithic piece of stone.
How do you calculate the volume of concrete needed for a slab?
Math is simple. You just multiply length by width by depth. But you must convert everything to feet first. If you’re pouring a 10 by 10 foot shed base at 4 inches thick, you divide 4 by 12 to get 0.33 feet. Multiply 10 by 10 by 0.33 to get 33 cubic feet. Then divide that by 27. This gives you the cubic yardage required. Most suppliers sell by the yard. And they usually have a minimum delivery of 1 to 3 yards.
Always add a buffer. Waste is inevitable. You’ll lose some mix to the bottom of the wheelbarrow or the inside of the pump hose. Spillage happens too. A 10 percent overage is the industry standard for a concrete slab cost calculator per square foot plan. It’s better to have a little left over for a couple of stepping stones than to be short. Running short is a nightmare. It costs more in the long run.
Is it cheaper to pour your own concrete slab?
Savings are tempting. You could save up to 50 percent by doing the labor yourself. But it’s brutal work. You’ll need to rent a mixer or coordinate a delivery truck. You’ll need to set the forms perfectly level. And once the truck arrives, the clock starts ticking. If you’ve never used a bull float or an edger, your finish will look like the surface of the moon. It’s not a beginner’s project.
Professional tools are expensive. Buying or renting specialized equipment eats into your savings quickly. If the slab is larger than a small sidewalk, hire a crew. They have the muscles and the experience to handle the set-time pressure. A bad DIY job is expensive to fix. You’d have to pay someone to jackhammer it out and haul it away. Then you’d still pay for the new pour. Save your back. Hire the pros.
How does location affect a concrete slab cost calculator per square foot?
Zip codes matter. Concrete is a local product. It’s too heavy and expensive to ship long distances. If your city has three competing ready-mix plants, prices stay low. But if you live in a rural area with only one supplier, you’ll pay a premium. Remote locations also face high delivery surcharges. Some plants charge by the mile or by the minute once the truck leaves the yard. These hidden fees can blow your budget apart.
Climate plays a role too. In cold northern states, slabs need to be thicker to withstand the freeze-thaw cycle. You might need air-entrained concrete to prevent surface scaling. In coastal areas, you might need special additives to resist salt-air corrosion. These chemical admixtures add to the concrete slab cost calculator per square foot. Check with local contractors. They know which specific mix is required for your soil and weather patterns.
Are there hidden fees in a concrete slab project?
Permits are mandatory. In 2026, most municipalities require a building permit for any slab larger than a small tool shed. These can cost anywhere from $50 to $500. Then there’s the debris removal. If you’re replacing an old driveway, you have to get rid of the old stuff. Dump fees are rising. Hauling away several tons of broken concrete is a major logistical task that adds significant cost.
Site prep is sneaky. You can’t just pour concrete on top of grass. You have to remove the topsoil. You have to grade the area so water flows away from your house. This requires heavy equipment like a skid steer or a mini-excavator. If your soil is soft clay, you’ll need extra gravel for stability. A accurate concrete slab cost calculator per square foot should always include these ground-level realities. Don’t let the prep work be a surprise.
Secure your project with these expert tips
Get three quotes. It’s the golden rule of home improvement. Make sure each contractor is quoting for the same PSI strength and thickness. Ask about the finish they’re planning to provide. A broom finish is standard for outdoor surfaces because it’s non-slip. A smooth trowel finish is for indoor floors. It’s slippery when wet. Ensure your contract includes the sub-base and any reinforcement you discussed previously.
Timing is everything. Don’t pour when rain is in the forecast. Water ruins the surface of fresh concrete. It weakens the cement paste. And don’t pour in extreme heat either. The water evaporates too fast and causes the concrete to crack before it’s even hard. Aim for a cloudy day with moderate temperatures. Your slab will cure slower. And a slow cure is a strong cure. Use your concrete slab cost calculator per square foot findings to negotiate fairly and get the job done right.
Frequently asked questions about concrete slab costs
How thick should a concrete slab be for a shed?
Most small sheds only require a 4 inch slab. If you’re storing heavy equipment like a tractor or a car, bump it up to 6 inches. Always use a gravel base to prevent the shed from sinking over time.
Can I pour concrete over an existing slab?
It’s possible but risky. You need to ensure the bottom slab is stable and free of major cracks. You’ll also need a bonding agent and likely a minimum of 2 inches of new concrete to prevent the top layer from shaling off.
How long should I wait before driving on a new slab?
Wait at least 7 days for a standard driveway. Concrete reaches most of its strength in 28 days. But it’s hard enough for light foot traffic within 24 to 48 hours depending on the weather.
What is the cheapest way to get a concrete slab?
A plain broom-finished slab is the most affordable option. Avoiding curves, stamps, and colors keeps the labor and material costs at their lowest. Using a standard 3000 PSI mix is usually sufficient for most residential projects.
Does concrete crack naturally?
Yes, it’s a fact of life. Concrete shrinks as it cures. This creates tension. Contractors use control joints to tell the concrete exactly where to crack. This keeps the breaks straight and hidden in the seams.
Why Choose Slide Rite USA for Waterslide Restoration
When it comes to waterslide restoration, selecting a reliable and experienced provider is crucial for ensuring the safety, functionality, and aesthetics of your waterpark attractions. One name that stands out in the industry is Slide Rite USA. With years of experience, Slide Rite USA has built an impeccable reputation for delivering exceptional results through state-of-the-art techniques and cutting-edge tools. Here’s why Slide Rite USA should be your go-to choice for all your waterslide restoration needs.
Expertise and Experience
Slide Rite USA has a proven track record, with more than a decade and a half in the waterpark restoration industry. They have amassed a wealth of knowledge and experience, allowing them to handle a wide range of restoration projects, from minor repairs to complete overhauls. Their portfolio includes work on various types of slides, showcasing their versatility and capability in delivering outstanding results.
Advanced Techniques and Tools
Slide Rite USA utilizes state-of-the-art methods and tools in waterslide restoration. By staying up-to-date with industry advancements, they ensure that their services are efficient, effective, and long-lasting. Their commitment to incorporating cutting-edge technology means that clients receive the best possible solutions tailored to their specific needs.
With a focus on superior quality, the use of high-quality materials and advanced methods allows Slide Rite USA to exceed industry standards. This dedication to excellence ensures that the restored slides not only look great but also perform optimally, providing a safe and enjoyable experience for visitors.
Customized and Affordable Services
Understanding that each waterpark has unique needs, Slide Rite USA offers customized restoration services. They work closely with clients to develop solutions that meet their specific requirements, ensuring that every project is handled with personalized attention and care.
Despite the high quality of their services, Slide Rite USA is committed to offering cost-effective options. They recognize the importance of maintaining a balance between cost and quality, making sure that waterparks get the best value for their investment. This approach helps clients manage their budgets effectively while still achieving superior results.

Customer-Centric Approach
Slide Rite USA places a strong emphasis on customer satisfaction. They prioritize building long-lasting relationships with their clients, ensuring that every interaction is positive and productive. This focus on customer service fosters trust and loyalty, encouraging repeat business and referrals.
Their dedicated support throughout the restoration process, from the initial consultation to project completion, ensures a smooth and stress-free experience for clients. The team is readily available to address any concerns or questions, providing exceptional support every step of the way.
Comprehensive Repair Services
Slide Rite USA’s comprehensive waterslide repair services are designed to enhance both the safety and aesthetics of your waterpark. They address issues such as structural damage, surface wear, and UV degradation, ensuring that the slides are safe for use and visually appealing.
By restoring slides to their original condition, Slide Rite USA helps waterparks maintain optimal performance. This not only improves the overall visitor experience but also extends the lifespan of the attractions, reducing the need for frequent repairs and replacements.
Conclusion
Choosing Slide Rite USA for your waterslide restoration needs means partnering with a company that combines decades of experience, advanced techniques, and a genuine commitment to customer satisfaction. Their tailored, cost-effective services ensure that your waterpark attractions remain safe, functional, and visually stunning, providing optimal enjoyment for all visitors. With their comprehensive repair solutions, Slide Rite USA stands out as a leader in the industry, delivering exceptional results that exceed expectations and uphold the highest standards of quality. Trust Slide Rite USA to breathe new life into your waterslides and keep your waterpark thriving for years to come.
DIY Plumbing vs. Hiring a Professional in Milton Keynes: Pros and Cons
When faced with plumbing issues, homeowners in Milton Keynes often grapple with the decision of tackling the fixes themselves or enlisting the help of a professional plumber. Each approach has its unique advantages and potential drawbacks, and understanding these can help residents make informed decisions. Whether it’s a leaky tap or a complete pipe overhaul, here’s a breakdown of the pros and cons of DIY plumbing versus hiring a professional.
DIY Plumbing: Pros and Cons
Pros
Cost-Effective: One of the primary reasons homeowners opt for DIY repairs is to save money. By avoiding labor costs, you can often complete minor repairs at a fraction of the cost of hiring a professional.
Immediate Attention: With DIY, you can address plumbing problems as soon as you notice them. There’s no need to wait for an appointment, which can be crucial in emergencies.
Skill Development: Tackling plumbing issues yourself allows you to develop and refine your handyman skills, which can be both satisfying and useful for future projects.
Cons
Limited Expertise: While some plumbing issues are straightforward, others require a level of expertise that most homeowners lack. Mistakes can lead to bigger problems down the line.
Safety Concerns: Plumbing tasks often involve water and electricity, a potentially dangerous combination. Without proper knowledge, DIY enthusiasts might risk personal injury or property damage.
Time-Consuming: Even simple tasks can become time-consuming if you’re unfamiliar with the work. This can be frustrating for those with busy schedules.
Hiring a Professional Plumber: Pros and Cons
Pros
Expertise and Experience: Professional plumbers bring years of training and experience to the table, ensuring that repairs are done correctly and efficiently. If you’re looking to minimize risks, it’s wise to look for the best plumber in your area to ensure quality service.
Access to Advanced Tools: Professionals have access to specialized tools and equipment not typically available to the average homeowner, allowing them to handle complex issues with ease.
Guaranteed Work: Many plumbing companies offer warranties on their work, providing peace of mind that if an issue arises, it can be resolved without additional cost.
Cons
Higher Costs: Professional plumbing services can be expensive, with fees varying based on the complexity of the job and the plumber’s reputation.
Scheduling Delays: You may need to wait for an appointment during busy periods, which can be problematic for urgent issues.
Less Control: When hiring a professional, you surrender control over the process, which can be frustrating for those who prefer a hands-on approach.
The Role of Companies Like TPA Emergency Repairs
In Milton Keynes, TPA Emergency Repairs is a prime example of the professional services available to homeowners facing urgent plumbing challenges. Specializing in rapid response and emergency repairs, they offer a safety net for those facing plumbing crises beyond the scope of DIY solutions. Their team of experts is equipped to handle everything from burst pipes to malfunctioning water heaters, ensuring that problems are resolved efficiently and effectively.
Conclusion
Ultimately, the decision to undertake DIY plumbing or hire a professional in Milton Keynes depends on the nature of the plumbing issue, your skill level, and your personal preferences. For minor, straightforward tasks, DIY might be sufficient, but for complex or emergency situations, seeking professional help from companies like TPA Emergency Repairs is advisable. By weighing the pros and cons carefully, you can make the best choice for your home and ensure that your plumbing issues are handled with care and expertise.